Homelab Chronicles 16: Simplifying Dynamic DNS

It’s been sweltering in the DC area. For most of the past week, we’ve had a “heat dome” over the region, meaning it’s gotten to around 100F (37.7C) multiple days. Coupled with high humidity—it’s been a rainy summer so far—that means I’ve been running my AC regularly. It is summer, after all.

In past years, back in Kansas City, I would sometimes turn off my server (!) in order to save on electricity costs.

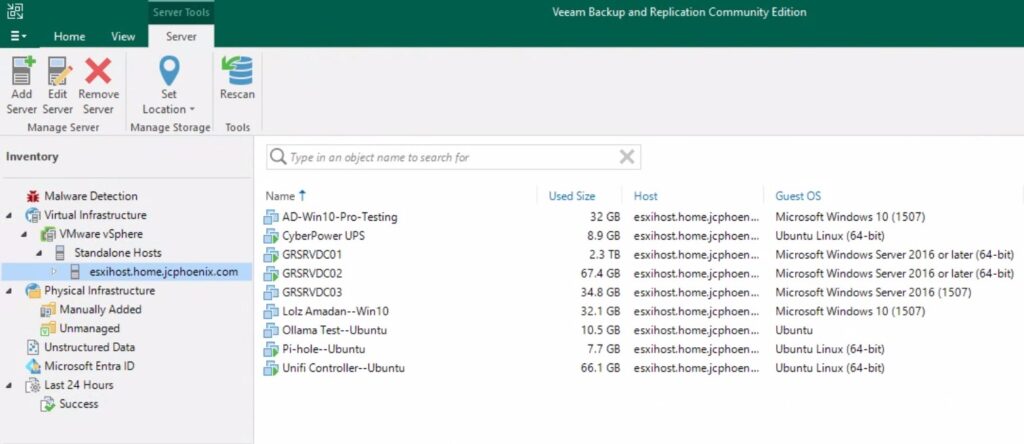
Let’s face it: I don’t do that much with my server. Yeah, it hosts my DCs, long-term storage, and some other services, but the reality is that I don’t really touch it that much. The computers I use regularly aren’t even domain-joined. I rarely go through my old music and movies/shows collections. And some of the services that used to be hosted on my server have been taken over by other devices.

On that last point, two come to mind: the Unifi Controller and WireGuard VPN. Unifi is now hosted on my Cloud Gateway Ultra. I had to host it in a VM when I had my old USG in place, but the UCG completely replaced that.

The same goes for Wireguard. I mentioned in Homelab Chronicles 11 that I set up WG-Easy within a VM. About a month ago, however, I set up Unifi Identity and a Wireguard server in the Controller. I’ve been testing that out with some of my devices and it’s been great. I have a couple of other devices where I need to switch the WG config files out, but once that’s done, I can sunset WG-Easy.

Related to hosting a VPN, is making sure Dynamic DNS is set up and working. I spoke about this in Homelab Chronicles 09. No matter where my VPN server is here at home, I need to know the IP address. With a dynamic, albeit “sticky,” IP address, the easiest way to do this is with a domain and DDNS.

Many home routers have a DDNS client built-in, and Unifi gateways are no different here. And there are plenty of registrars and DDNS services it can work with. My domain is hosted at Namecheap, which is one of the services Unifi can work with. Unfortunately, I point it to nameservers at Dreamhost. That’s where this blog is hosted!

I could move the DNS back to Namecheap, but with this site and email, I’d rather not. So what to do? I want to stop doing DDNS from my server, but don’t want to move the domain’s DNS to a compatible service.

Well, there’s where money comes into play. Yes, that’s right, cold hard cash to the rescue.

I bought a new domain at Cloudflare. Spent a whole $7.50, which rises to $11/yr after the first year.

Afterwards, I put the domain details and API key into Unifi. Then about a minute later, I checked the DNS at Cloudflare, and behold! My home IP address as an A Record!

I still need to update the existing individual WG config files on each device by changing the server address to my new domain. Then I need to test it by seeing if I can connect. But I’m not expecting any issues; I’ve done this before a few times with work VPN config files.

Once I’ve confirmed everything is working, I can turn off WG-Easy and stop my current DDNS cronjob. And that should be the last external facing service. I can power down my server until I need it again.

Anyway, that’s it. Nothing super technical today. My point with this post is that sometimes spending a little money can be the quickest solution. I probably could’ve spent a couple hours working on trying something else. Like moving the DNS isn’t difficult, but it can be tedious and delicate, especially with DNS propagation. With long TTLs, it can potentially be awhile to see if the migration worked properly.

But spending about $10/yr will have saved me a decent amount of time and effort. I can’t always spend money to solve problems. Some solutions might be too costly. Though this is a case where it made the most sense.

Lastly, I decided to go with Cloudflare instead of Namecheap, where my other domains are hosted, mainly because I’ve never used Cloudflare before. I know Cloudflare provides some DDOS protections, but I’m not really expecting to ever have to utilize those. It was also slightly easier to configure in Unifi and it was cheaper.

OK, time to test.

Homelab Chronicles 15: Three VLANs to Rule Them All

I finally split out my IoT devices onto their own VLAN. That’s it that’s the post. See you all next time!

No, of course I gotta say more. I’m a wordy MFer, after all! But yes, I finally put the IoT stuff on its own network. I should’ve done it a long time ago. It’s been on my list of Homelab to-do’s for like 4-5yrs. A good chunk of not doing it was because I wasn’t sure how to implement it.

I had experimented with VLANs a couple years ago, then doing some basic firewalling to make sure the VLANs and the devices on them couldn’t communicate. I set up a couple VLANs and then created an “RFC 1918” firewall rule to disallow communications between VLANs and their associated subnets. I even have a couple ports tagged on my switches for network isolation purposes.

Lately at work, however, I’ve had some opportunities to play around with and troubleshoot some of the network and firewall issues. So with that better understanding of the Unifi Zone Firewall Policies, I finally pulled the trigger.

I guess I’ll start from the beginning, explaining the three main VLANs I have:

  1. The Default/Main VLAN. This has my computers, consoles, phones, etc.
  2. The Guest VLAN. This one is attached to my guest WiFi, naturally. Device isolation is enabled here.
  3. The IoT VLAN. This is my smart plugs, WiFi bulbs, Google Nest devices, TVs, etc.

The reason for separating the IoT devices from everything else has to do with security. Some of these devices are cheap smart plugs and even smart bulbs. Some of these are from overseas companies I’ve never even heard of before. That’s on me for using these instead of stuff from a more reputable brand, but still. Who knows what any of these devices are doing or watching on the network. I’ve mentioned before I have some Google Nest devices. Are these snooping on my network, sending network usage patterns back to Google? Who knows.

Anyway, most of these IoT devices require WiFi. So I created a new WiFi SSID and attached the IoT VLAN to it. I don’t necessarily know if it increases security, but I also set it as a hidden network. At the very least, since I live in a sizable apartment complex, I didn’t want to further clutter up an already cluttered SSID list. That said, there are one or two devices that are wired, such as TVs. For those, I had to tag ports on the appropriate switches. That’s one area I would like to play with more: port tagging. However, since I’m using some of the more basic Unifi gear, there are some limitations.

Fom there, I merely had to place the networks in the correct zones. I created a new IoT zone and then moved the IoT VLAN into it. My Main network is in the out-of-the-box Internal zone. And when I created a Guest WiFi network, Unifi automatically placed it in the Hotspot zone, with the proper firewall rules to isolate the network (devices on the Guest network are also isolated from each other).

By default, user-created zones in Unifi are automatically isolated from other networks (though they’ll always at least have Internet access, which is in the External zone). So creating the IoT zone did most of the work for me. I didn’t have to create all these rules to isolate it from other zones. However, I wanted devices in the Internal zone to be able to communicate to devices in the IoT zone. Two reasons for this:

  1. If I lose Internet access, I want some limited control over IoT devices. I don’t want to have to press the power button on my smart switches if I want to turn them on/off; I want to be able to use my phones and apps.
  2. I have a Chromecast and a few other devices that I can cast media to. I moved those devices to the IoT VLAN, but of course my computers and phones will remain on the Main VLAN.

However, if a device is communicating “down” to devices in the the isolated IoT VLAN, there needs to be some ability to communicate “up” as well. If I ping from Main to IoT, that only works if IoT can respond back. But I don’t want to devices from IoT able to initiate and maintain connections to Main.

Luckily, Unifi makes this easy—though I had to ask around and play around a lot to figure this out.

One single rule in the “source Internal, destination IoT” part of the zone matrix can be made to allow this behavior. On the source side, I selected the Main (Default) network in the Internal zone to allow connections on any port. On the destination side, I have the IoT network in the IoT zone. The most important thing here is, on the source parameters, that checkbox to “Auto Allow Return Traffic.” When the rule is saved, that checkbox creates a corresponding partner rule in the “source IoT, destination Internal” part of the matrix to allow only traffic from IoT only if Internal initiated first.

Essentially, I can ping from Main to IoT, but I can’t ping from IoT to Main. This works because the “bottom” rule, or broadest firewall rule, in the IoT zone, disallows traffic to/from any other zones. Like I said before, that’s Unifi’s default behavior for new zones. My rule creates an exception to the policy.

I tested everything out afterwards, and the results were mixed. I disconnected my network from the Internet to see how different applications would react. From my cell phone (also only on WiFi), I could easily still control the smart plugs, which is exactly what I wanted.

But the media casting wasn’t as successful. The Chromecast seemed to accept casting from a computer via direct network connection, but Spotify on my phone didn’t quite work with my Google Nest speakers without Internet. Not ideal, but I don’t cast that much anyway. The main thing is controlling my lighting.

With this finally done, I feel like my basic network setup is essentially complete. There’s always more that I could tweak. For example, I have a printer. Maybe I put the printer on its own VLAN and allow any device in any network the ability to print to it. Right now, it sits in the Main VLAN with my computers. I don’t have that many guests, so it’s really NBD.

But for now, this is good. Time to move onto something else.

Game Complete! Legend of Heroes: Trails in the Sky, The 3rd

That’s a wrap on the “Legend of Heroes: Trails in the Sky” trilogy! Only took me about 14 years to finish all three entries, but who’s counting?

“The 3rd” was an interesting end to the trilogy. Because it’s not really wrapping up the story in “FC” and “SC,” the first and second chapters, respectively. The story there was wrapped in up “SC.”

It does take place six months after the events of “SC,” and features all the characters from the first two games, in familiar locations. “The 3rd” is almost like an additional story. It focuses on Father Kevin Graham of the Septian Church. He made his first appearance in “SC,” as a supporting character. As such, it was a bit surprising that “The 3rd” focused entirely on him and his story.

That surprise actually made me put it down the first time I tried playing “The 3rd.” Back in December of 2022, not long after I had finished “SC.” I think I was also a little burned out on JRPGs, given I finished both “FC” and “SC” that year, back-to-back.

Anyway, I don’t know what I was expecting, but I didn’t expect Kevin Graham, and his sidekick and foster sister Sister Ries Argent, to be the main characters. I thought I’d get to see more of Estelle and Joshua, the main characters of the first two “Trails in the Sky” entries.

Which I did. Estelle and Joshua are playable characters in “The 3rd.” But they’re supporting characters only, in the same way Kevin was in “SC.”

I probably put in like 10 hours in that first attempt, but I wasn’t sure where the story was going. So I put it down until March of this year, when I restarted it. I decided I to do a full playthrough of the “Trails” series, so I had to finish “The 3rd.”

And I’m glad I did. The story overall was interesting. Many of the optional sidequests provided additional history and context for the various party members. The one for Renne, was particularly dark, but it explained why she is the way she is. Other sidequests gave more lore about the world. The history of orbal mechanics or nations and organizations within the world of Zemuria. One of the big strengths of the “Trails” series is its lore and worldbuilding, so I was glad to see even more of it.

I’m never trying to do a full synopsis or review with these posts, so I’ll start wrapping it up. Here are my “stats” for “Legend of Heroes: Trails in the Sky, The 3rd:”

  • US Release: 2017-05-03
  • Purchased on Steam: 2022-07-01
  • Played on: PC (Steam) & Steam Deck
  • Installed: December 2022
  • Start Date: Attempt 1 – Dec 2022 // Attempt 2 – March 2025
  • Time in-game based on Steam: 148.5 hrs (across both attempts)
  • Time in-game based on Save Date: 108 hrs
  • Completed: 2025-05-04

This was a long playthrough. But as usual, I went down the completionist route. I don’t think I necessarily achieved a perfect 100% completion, but I did finish all the sidequests. All the Moon Doors, Star Doors, and Sun Doors; even those that could be played multiple times at different difficulties. I may have looked at guides for some of those 😅

And as I always do in JRPGs, I grinded. HARD. There were several nights where all I would do for 2-4 hours is run back and forth on a map, fighting mobs. For all the playable characters. Which worked out because the final bosses sequence definitely required use of all 16 party members. For what it’s worth, my final party consisted of Kevin, Ries, Colonel Alan Richard, and Senior Brace Scherazard Harvey.

With the “Trails in the Sky” trilogy completed, I’ve finished the “Liberal arc.” Liberl is the country where these three games take place. But now it’s time to move onto the “Crossbell arc,” with the first entry, “Legend of Heroes: Trails from Zero.” Hope to have a ‘Game Complete!’ post for it sometime this summer!

Game Complete! Legend of Heroes: Trails in the Sky SC

NOTE: I’m submitting this only 2.5 years late…

So it took me like a month and a half, but I call on that an “on-track” completion! Especially when it typically takes me years, if I ever finish a JRPG in the first place.

But yeah. Legend of Heroes: Trails in the Sky SC in the second chapter of this trilogy. But it wasn’t a cliffhanger like most second parts in a trilogy. It nicely tied up everything from FC.

In many ways, SC was the real “meat” of the two games. FC set up the world and the main characters. And here and there, a bit of the villains and the existential threat to the world. Y’know, just JRPG things. But FC ended on a major cliffhanger, where Joshua “woke up” and split from Estelle. SC picks the story back up with Estelle chasing down Joshua and finding out about his background, and who’s pulling the strings. Again, just JRPG things.

Overall, it was an enjoyable story! The dialog (English localized) was excellent. I’ve heard that the localization didn’t really keep with the original Japanese tone and manner. But frankly, I don’t care. Because the dialog, like by Estelle, was hilarious. I think it really made the characters much more likable and interesting.

Anyway, here are my stats for Legend of Heroes: Trails in the Sky SC:

  • US Release: 2015-10-29
  • Purchased on Steam: 2020-06-27
  • Played on: Steam Deck
  • Installed: 2022-10-26
  • Start Date: 2022-10-26
  • Time in-game based on Steam: 142 hrs
  • Time in-game based on Save Data: 115:20 hrs
  • Completed: 2022-12-13

It took 142 hours is because I like to explore everything and do any and all side quests. I’m a bit of a completionist. I also like to grind a lot. I usually try to over level characters—all of them—so that I don’t usually have any serious issues with fights like boss battles. Plus, never know when the game might force me to use a character I don’t normally use. That said, I’m sure at least 10 hours is simply being AFK.

Homelab Chronicles 14: Backing up VMs with Veeam

I just realized Veeam is probably called that because of “VM.” Vee-M. Veeam. I’m a smart guy.

I’ve had Veeam Community Edition for awhile now. I’ve mainly used it to do one-off backups of ESXi VMs. I think the first time I used it was when I was resizing a VM. I think I made it too large and needed to shrink it down. Which will be a theme here. In case I messed up, I backed it up beforehand. Working directly with VM configuration files through text editors and CLI, there was a high chance of that. But I never had to rely on the backup, luckily.

My goal this time, however, was to setup regular, scheduled backups of my important VMs:

  • Windows Server DCs
  • Pi Hole
  • UPS VM
  • Ubuntu Server

I had a spare 4TB external HDD lying around, so I chose to use that as the storage repository. I could’ve gone the way of creating another VM and installing Veeam on it, but for some reason, that seemed…odd? I wouldn’t back up that “Veeam VM” anyway. But some cursory searching online yielded recommendations of using a separate physical device as the host. So that’s what I did.

I had an old Intel NUC that I rescued from eWaste from my last job as we were moving out. It was used to drive a display board in our lobby. It has 4GB of RAM, 120GB SATA SSD, and a Celeron Nxxx CPU. Not sure exactly what model. A bit scant on power, but it was fine for Ubuntu and Internet connectivity.

Photo of the Intel NUC.
The little Intel NUC that could. Maybe?

But enough for Veeam? And Windows 11? Only one way to find out.

I chose Windows 11 since the Windows 10 End of Life is in October. I’m slowly moving my devices that way, but that’s another story. Installing Windows 11 did take quite awhile. And even just signing-in to the desktop was slow.

After running Windows Updates, which again was slow, I wanted to install Veeam 12 Community Edition, the latest version. Unfortunately, Veeam’s website is awful. Trying to find the download link required me to give my email address. And I still didn’t get an email. Luckily, I saved the ISO of version 11, so I installed that version.

I connected the 4TB external drive to the NUC, and then in Veeam, added that as a backup repository. Following that, I tried adding my ESXi host, for which I had to provide username and password. All the VMs appeared!

Veeam sees all the VMs in ESXi.

Next, I set up a test backup run. For this target, I chose a smaller VM: my Linux-based VM that hosted the UPS monitoring system. This VM was thin-provisioned at 20GB, but only about 7GB was being used at the time.

After a few minutes, it completed successfully! Lastly, I set up a schedule for daily backups. None failed for the the few days I let it run. I got some warnings, but they were about limited space on the ESXi host. Which I knew about; the ESXi datastore is like 90% filled.

After those successful backups, I decided to upgrade to the latest version. Unfortunately for me, I had to do a 2-step process up upgrades. My version of Veeam 11 was old enough that I couldn’t go directly to v12. I had to do an intermediate step.

Once that was done, and once I found the download link for Veeam 12, I attempted the installation. Sadly, when the installation was almost done, I received an error that some Veeam service couldn’t be started. I should note that this NUC was so slow, that it took forever to install. I’m talking at least 2hrs. I think it would’ve been faster with a beefier computer. So it took me a few days to try all this Anyway, after a reboot, I tried again to upgrade, but I got the same issue. This time, I took note of the service that wouldn’t start: some Veeam threat hunter. To be fair, the upgrade installer did warn me about potential issues with existing AV. I ended up turning off Windows Defender and system security during the installation. That seemed to solve the issues on my final upgrade attempt. I turned security back on afterwards.

With everything finally up-to-date and my test backup successful, it was time to do it for real. I had five VMs I wanted to backup. I could’ve set an individual backup job for each VM. But I also had the ability to include multiple VMs within a single job. Once again, I went to the Internet. I found a post on reddit, where the suggestion appeared to be grouping similar OSs together. Apparently this helped with deduplication, since many system files of VMs with similar OSs will be the same.

The downside, however, appeared to be potentially higher chances for corruption. If a backup job got corrupted, multiple VMs could be affected at the same time. But I figured since I was storage space-constrained with my 4TB external HDD, more deduplication would be more advantageous.

So I created two jobs:

  • 3 Linux-based OSs – Ubuntu Server, UPS VM, and Pi Hole; I called these “Services.”
  • 2 Windows Servers – the DCs and fileserver; I called these “Windows”.

I also had to set the schedule and retention. For both jobs, I chose weekly backups. One on Monday, the other on Wednesday, but both starting at midnight. For retention, I kept the following for Services:

  • 21 days of backups
  • 4 weekly full backups at all times.
  • 6 monthly full backups at all times.
  • 1 yearly full backup at all times.

While for Windows, I opted to keep backups for 21 days, with 1 yearly full backup kept at all times. I’d like to keep more, but I’m storage space constrained.

I then created my initial backup of each by running each job manually. Both were successful. The Windows backup was quote long at 9hrs. The main reason being that the primary Windows Server VM, which was also the fileserver, was thick-provisioned for 2.3TB. Even though I’m only using less than 1TB total. When I created the VM, I mistakenly chose thick-provisioning. Which is why the ESXi datastore is almost full. For reference, the secondary Windows Server VM is only about 80GB thin-provisioned.

Success on the Windows Server backups!

Which is a big reason I’m doing this. Because I need to resize that Windows Server VM. And before I do that, I want to make sure I have a backup. I also want to redo the physical server’s drive configuration. I want to add a new HDD to the virtual drive or RAID pool. Which for some reason, I can’t do right now. I’ve ordered a new RAID card to see if that’ll help.

I also want to think about the retention policy some more. I quickly set the number of retained full backups without really thinking too much about it.

That said, before I even do that, I really need to test the backup. Same with a Windows Server backup I’ve been doing on the primary server VM. But given my current storage constraints, I’m not even entirely sure how I’m going to do that. I think that’ll be the next thing I work on.

Backlog Burner: Yes, Your Grace

Details

  • Released: March 6, 2020
  • Purchased: Dec 1, 2020
  • Discounted at Purchase? Yes, 25% off
  • Bingo Category: “Has Romanceable Characters”
  • Time played: 2.6hrs

Why this game?

From the store page, I know there was some potential to marry off princesses and such. I don’t know if that’s necessarily romantic, but it could be.

Review

This is one of those games where player choices matter. A lot. Like from the very first decision point, you can lose the game. I know because I tried it! That said, it’s not a roguelike. After playing for an hour, I decided of out nowhere to restart. I wasn’t doing poorly, but I was curious if the NPCs or story would change. It didn’t. I was presented with the exact same NPCs and their quests. Making the same decision, the result was the same.

Importantly, it’s rarely clear how a decision will shake out. If I give a peasant some of the limited gold from the treasury to build an inn, what do I get out of it? What does the kingdom gain? Will he actually build the inn? Even if he does, it’s possible it might not even profitable. Which would be a waste of precious gold. Saving a lost child might improve relations with the people of my kingdom. But is it worth tying up my general for two turns? What if I need him for something else more important? It’s hard to say.

Quite a view from the castle wall. Would be a shame if something happened to it…

So decisions are often made blindly. Which is how it sometimes is in real life. I’m the ruler here. The king. I’m “paid” to make the decisions for everyone. And my decisions affect everyone. One wrong move and the enemy may be at the castle gates!

There is some resource management here, too. I mentioned the limited gold treasury, but there’s also farmed goods, soldiers, the people’s happiness, and even carrier pigeons, that have to be managed. Same goes will allies. I may have an ally, but that doesn’t mean the ally is helping for free. What does the ally want? Money? Perhaps my daughter’s hand in marriage? Will my ally help at all?

Verdict

I enjoyed it. I thought it was going to be a slow start, but honestly, it ramps up pretty quickly. I felt the tension and worry from my decisions. Did I make the right choice? I sure hoped so.

Will I come back to this game? Not sure. Sounds weird right? I said I enjoyed it. But there’s a reason I play a lot of JRPGs, which are known for their linearity. I often like being told a story as opposed to participating in the story. I never really liked those “choose your own adventure” books as a kid. And that’s exactly what this is. We’ll see.

Backlog Burner: The Battle of Polytopia

Details

  • Release: February 2016 on iOS / August 4, 2020 on Steam
  • Purchased: December 28, 2020
  • Discounted at Purchase? Yes, 35% off
  • Bingo Category: “Has an Isometric Perspective”
  • Time played: 1hr

Why this game?

Easy: It’s got an isometric, voxel style perspective and style.

Review

I’ve played plenty of the Civilization games, as well as RTSs like Rise of Nations. I wasn’t entirely sure if Polytopia was a turn-based or RTS. Turns out, it’s turn-based.

My nascent empire.

Which means that this is essentially a distilled and simplified Civilization! Cool. The default or main game mode is called “Perfection.” You have 30 turns to get as high as score as possible. And that’s done by growing your cities, claiming territory and cities, researching tech, fighting other NPC empires, and exploring. I like that in this mode there’s an ending. That’s always an issue in Civ games, where the games just go on forever. I think I’ve finished maybe two or three games when I’ve played Civ. And I played a lot of Civ 4 and Civ 5 in college.

Since Polytopia not nearly as complex as Civilization, with not nearly as much going on, processing all the turns is quick. My 30-turn play was done in about an hour. It probably would’ve taken longer if I’d had taken the time to read everything. Like the technology in the tech tree, to really understand what the benefits are. Conversely, I imagine once I know all the tech, it’ll go way faster.

The simplified tech tree.

There are two other modes: a no-turn limit mode and a creative mode. I’ve yet to try either.

Verdict

I like it. Its very mobile game-esque. Which is great, since it is also on mobile (I played it via Steam on PC). I could totally see playing this at work on break or lunch on my phone. Or maybe at an airport, waiting to board. It’s straightforward, doesn’t require a lot of deep understanding, and quick.

I’d definitely play this again, if I’m in the mood for Civ, but without having to sacrifice tons of time.

Kickin’ ass as the Kickoo!

Backlog Burner: Odysseus Kosmos and his Robot Quest

Details

  • Released December 1, 2017
  • Purchased: July 1, 2021
  • Discounted at purchase? Yes, 70% off
  • Bingo Category: “A solo-dev project”
  • Time played: 2.4hrs

Why this game?

I’m not actually that sure this is a “solo-dev project.” Some quick Googling made it seem that it may have started as one. However, looking into it a little more, I get the feeling there is/was a small team who made this game. Oops. Oh well, it was still in the backlog. Still played it.

Review

I grew up in the 90s playing or watching my older cousins play point and click adventure games. Day of the Tentacle. Freddy Pharkas: Frontier Pharmacist. Sam and Max Hit the Road, which is definitely a classic. Even some Leisure Suit Larry, even though I was probably too young! Plus other Sierra adventure games.

So when I saw Odysseus Kosmos some years back, I got hit with that nostalgia bomb. It’s not like I haven’t played any adventures games since then. I’ve played pretty much all the Monkey Island games, including more recent ones. And some of the Tell Tale Sam and Max entries. But these somewhat recent games didn’t have that aesthetic from the 90s. They’re all 3D. On the flipside, Odysseus Kosmos seem to have it that 90s look in spades. Just look at it!

Graphics obviously better than the 90s. I can actually see a face on the robot!

I played nearly 2.5hrs. This included the “pilot episode,” which is basically a demo. I’m only in episode 1 of 5. So, as usual, not terribly far. But one of the things I liked right off the bat are the puzzles. Namely that they’re relatively straightforward. For example, in the screenshot above, there’s an intercom speaker in the top left. When I clicked on it, I was informed a screwdriver was also stuck on it, which you can’t really see. No clue how it got there. But I know I needed it. On the computer terminal on the desk, I noticed there was a volume control for the intercom. Oh! What if I turn the volume all the way up and use the intercom? It should send some serious vibrations, maybe enough to shake the screwdriver loose. Gave it a try and it worked!

I’ve played some other point and clicks where the solutions were just too esoteric. To me, the biggest offender of that is Grim Fandango. By the end, I had to use a walkthrough to finish the game. The item combos and what they should be used on made no sense. Without a guide, I would’ve never figured out some of those. Unless I was just randomly clicking and trying each and every combo out. It wasn’t fun.

Now being in the beginning of the game, hard to say if this will hold true. I’m sure it gets harder. But hopefully not too much.

One of downsides, which I should’ve expected, is the dialog. P&C adventure games often have a lot of dialog. Corny and slapstick-y. But I feel like here the game is trying just a bit too hard. Obviously not all dialog will be LOL funny. But a lot of it here I’m just like, “OK, just stop talking, I need to figure out this puzzle.

Verdict

I think I’ll come back to this game. It’s not a game I’ll necessarily play through in long sittings. Though I could absolutely see myself playing for an hour or so, then coming back to it a few days later. It seems like a solid, modern adventure game.

And for as cheap as it was—think I paid $4.99 for it—it’s basically a steal. If the goal is $1/hr, one could easily get at least 10hrs out of it. Especially since there are five episodes total.

Backlog Burner: Signalis

Details

  • Released: October 27, 2022 (Steam)
  • Purchased: July 6, 2023
  • Discounted at purchase?: Yes, 20% off.
  • Bingo Category: “Has both Puzzles and Combat”
  • Time played: 2.8hrs…so far

Why this game?

I knew from the Steam Store page, that Signalis is in the same vein as Resident Evil. I haven’t played a lot of any Resident Evil game, but I’ve played just enough to know there are puzzles and combat.

Review

A couple of the Steam user tags on this game are, “Survival Horror” and “Psychological Horror.” These are not games I typically play. Because I’m a huge scaredy-cat. I don’t mind watching others play horror games. I’ve watched plenty of Markiplier and Dan & Phil play “Five Nights at Freddy’s” and similar. But I don’t like being in the driver’s seat for horror games. The horror games I’ve played the most are “Parasite Eve” (PS1) and Alan Wake (360). The former I basically completed; the latter maybe a quarter-way.

So why would I buy and want to play this game? Because it looked cool. Anime, cyberpunk, and that original Playstation-esque art style? Sign me up.

And I’m so glad I finally gave it a try.

I loved the ambiance of it. The music, of often lack of it, really helped set the scenes. Often, all I hear is the drone of the facility we’re in. But when something like an enemy notices me or surprises me, the near-silence is cut by a shrill scream — not sure if it’s my character or the enemy — and this nervousness-inducing music starts playing. My heartbeat definitely speeds up.

Visually, there’s lots of darkness and dimness, some parts of the screen are occluded by beds, shelves, walls, etc. So it keeps on my toes. Ooh, what’s around this corner? My character will have her gun drawn, as I slowly navigate her around.

I do like the juxtaposition between dark and grimy environs and cute anime girls.

At its core, this is a mystery game. Why did we crash on this planet? Why are we searching for this other woman? Why is she at this facility? And what in the fuck is going on in this facility, where people are disappearing or dying? What did they find underneath the facility? Luckily, I love mystery games, so this is right up my alley.

One of the things I learned is that I have to be intentional about engaging enemies. Because my character has limited ammo. Like VERY limited. At one point I had like 25 pistol rounds. But it takes 2-4 shots to incapacitate an enemy. And so far, there’s been more than six enemies in an area. I think I’m now down to less than five rounds. Yikes. Very reminiscent of my time in “Alan Wake.”

I do actually enjoy games like this, where you can’t just always go in guns blazing. It’s necessary to plan and strategize moving around the facility. Maybe I can ignore this baddie, but then kill that one in that hallway. Or maybe I can try outrunning all of them. But I can’t kill them all.

Oh god, oh god, oh god…

I’m just under three hours in. I’d be further along, but other than the first session (about an hour), the others have been like 15-25min. Because I’m scared! So it’s like “OK, let’s do this…Oh god, almost died! Let’s save and take a break!” Lol.

But it does keep reeling me back in. I’ll definitely keep playing it. Will I finish it? I hope so. But I have a terrible track record of came completion.

Backlog Burner: This War of Mine

The first game in this Backlog Burner is, “This War of Mine.”

Details

  • Released: November 14, 2014 (Steam)
  • Purchased: July 4, 2016
  • Discounted at purchase?: Yes, 75% off
  • Bingo Category: “Has a Lives System”
  • Time played: 1hr, 18min.

Why this game?

I imagine a “Lives System,” conjures up thoughts of Mario games, where you get 1-Ups. Instead, I took a broader angle with it. Because I don’t think I have a single game in the backlog with a true “Lives System.” I don’t really play platformers.

However, in “This War of Mine,” (TWoM from here on out) characters can die permanently, while the game continues. Unless everyone dies. So to me, that means there’s a “Lives System.” Maybe I should’ve chosen this one for the “Has Permadeath” category.

Review

Right off the bat, this game reminded me of “Frostpunk.” And whadyaknow, it’s made by the same developer! While “Frostpunk” stems from climate catastrophe, and TWoM starts with a civil war, both are 100% survival management games. Though from different heights: Frostpunk is about keeping a village or town alive, while TWoM is about a small group of people, essentially a household, surviving.

With not even an hour and a half of playtime, I didn’t get terribly far. Only to Day 6. There was no tutorial, which was a little surprising, but I wonder if that’s intentional. In a real like situation, trying to eke out a living in a city under siege, there’s no tutorial. I imagine you make it up as you go along.

I had to manage my three characters’ hunger, tiredness, health, and warmth. Didn’t have to worry about warmth, as the temperatures were still in the 60s F (15.5-20.5C). The tiredness was easy—just send people to bed—but the hunger was definitely more challenging. I realized that not everyone could eat everyday.

I scavenged a couple of locations, but even though those places were plentiful with materials, I couldn’t get much. A character can only hold a limited amount of items. But then those items would quickly be used for firewood for cooking, filters for making clean water, or making lockpicks or shovels. Meaning I’d have to go out the following night for sure. And I had to choose whether to prioritize food or other materials to take back. Yet I needed both!

Canned food is the best you all are getting for awhile…

I didn’t do too much combat, but I did do a bad thing…At one house I was scavenging, there was an NPC squatting there. He saw my guy, started begging him for food, and followed my character around as he was checking out the house…So I killed him with a shovel. I just wanted to know what would happen!

Nothing happened. No secret police or friend of the deceased jumping out of the shadows. I did feel a little bad afterwards, since the NPC was nonviolent, simply begging. I checked his body afterwards and he had nothing. So I killed him for no reason. Which made the character I was controlling sad, on top of being hungry and tired.

Better him than you, my man. Just sayin’.

I essentially stopped it there. I kinda got bored. I know I didn’t get deep into it, but I was expecting a little more danger or something at the start. Or I don’t know, some direction. I thought this game would be more scenario-like, like Frostpunk. I need to survive X amount of days, and do at least Y and Z to achieve that goal. Instead, it’s more like a sandbox. I don’t hate sandboxes, but I feel like having some explicit direction would help, other than, “Survive.” Maybe this is why I don’t really play survival games.

Would I get back to This War of Mine? Yeah, probably. I didn’t dislike it. Just got bored. Maybe just wasn’t in the mood for it.

Either way, that’s one game on the backlog crossed off. This is my “war of mine.”